
Redesign of an original IR-thermometer
2 weeks project, Spring 2019, MFA Umeå Institute of Design
Individual project
Challenge
The purpose of the project was to learn about parametric modeling and production techniques. This by dismantling an existing IR-thermometer and placing the inner components into a new design with the outcome of a fully working prototype.
Approach
I decided to design my thermometer for kitchen use and the brand Bodum, where I decided to challenge the original pistol grip by turning the shape into a self-standing object instead.

Starting point
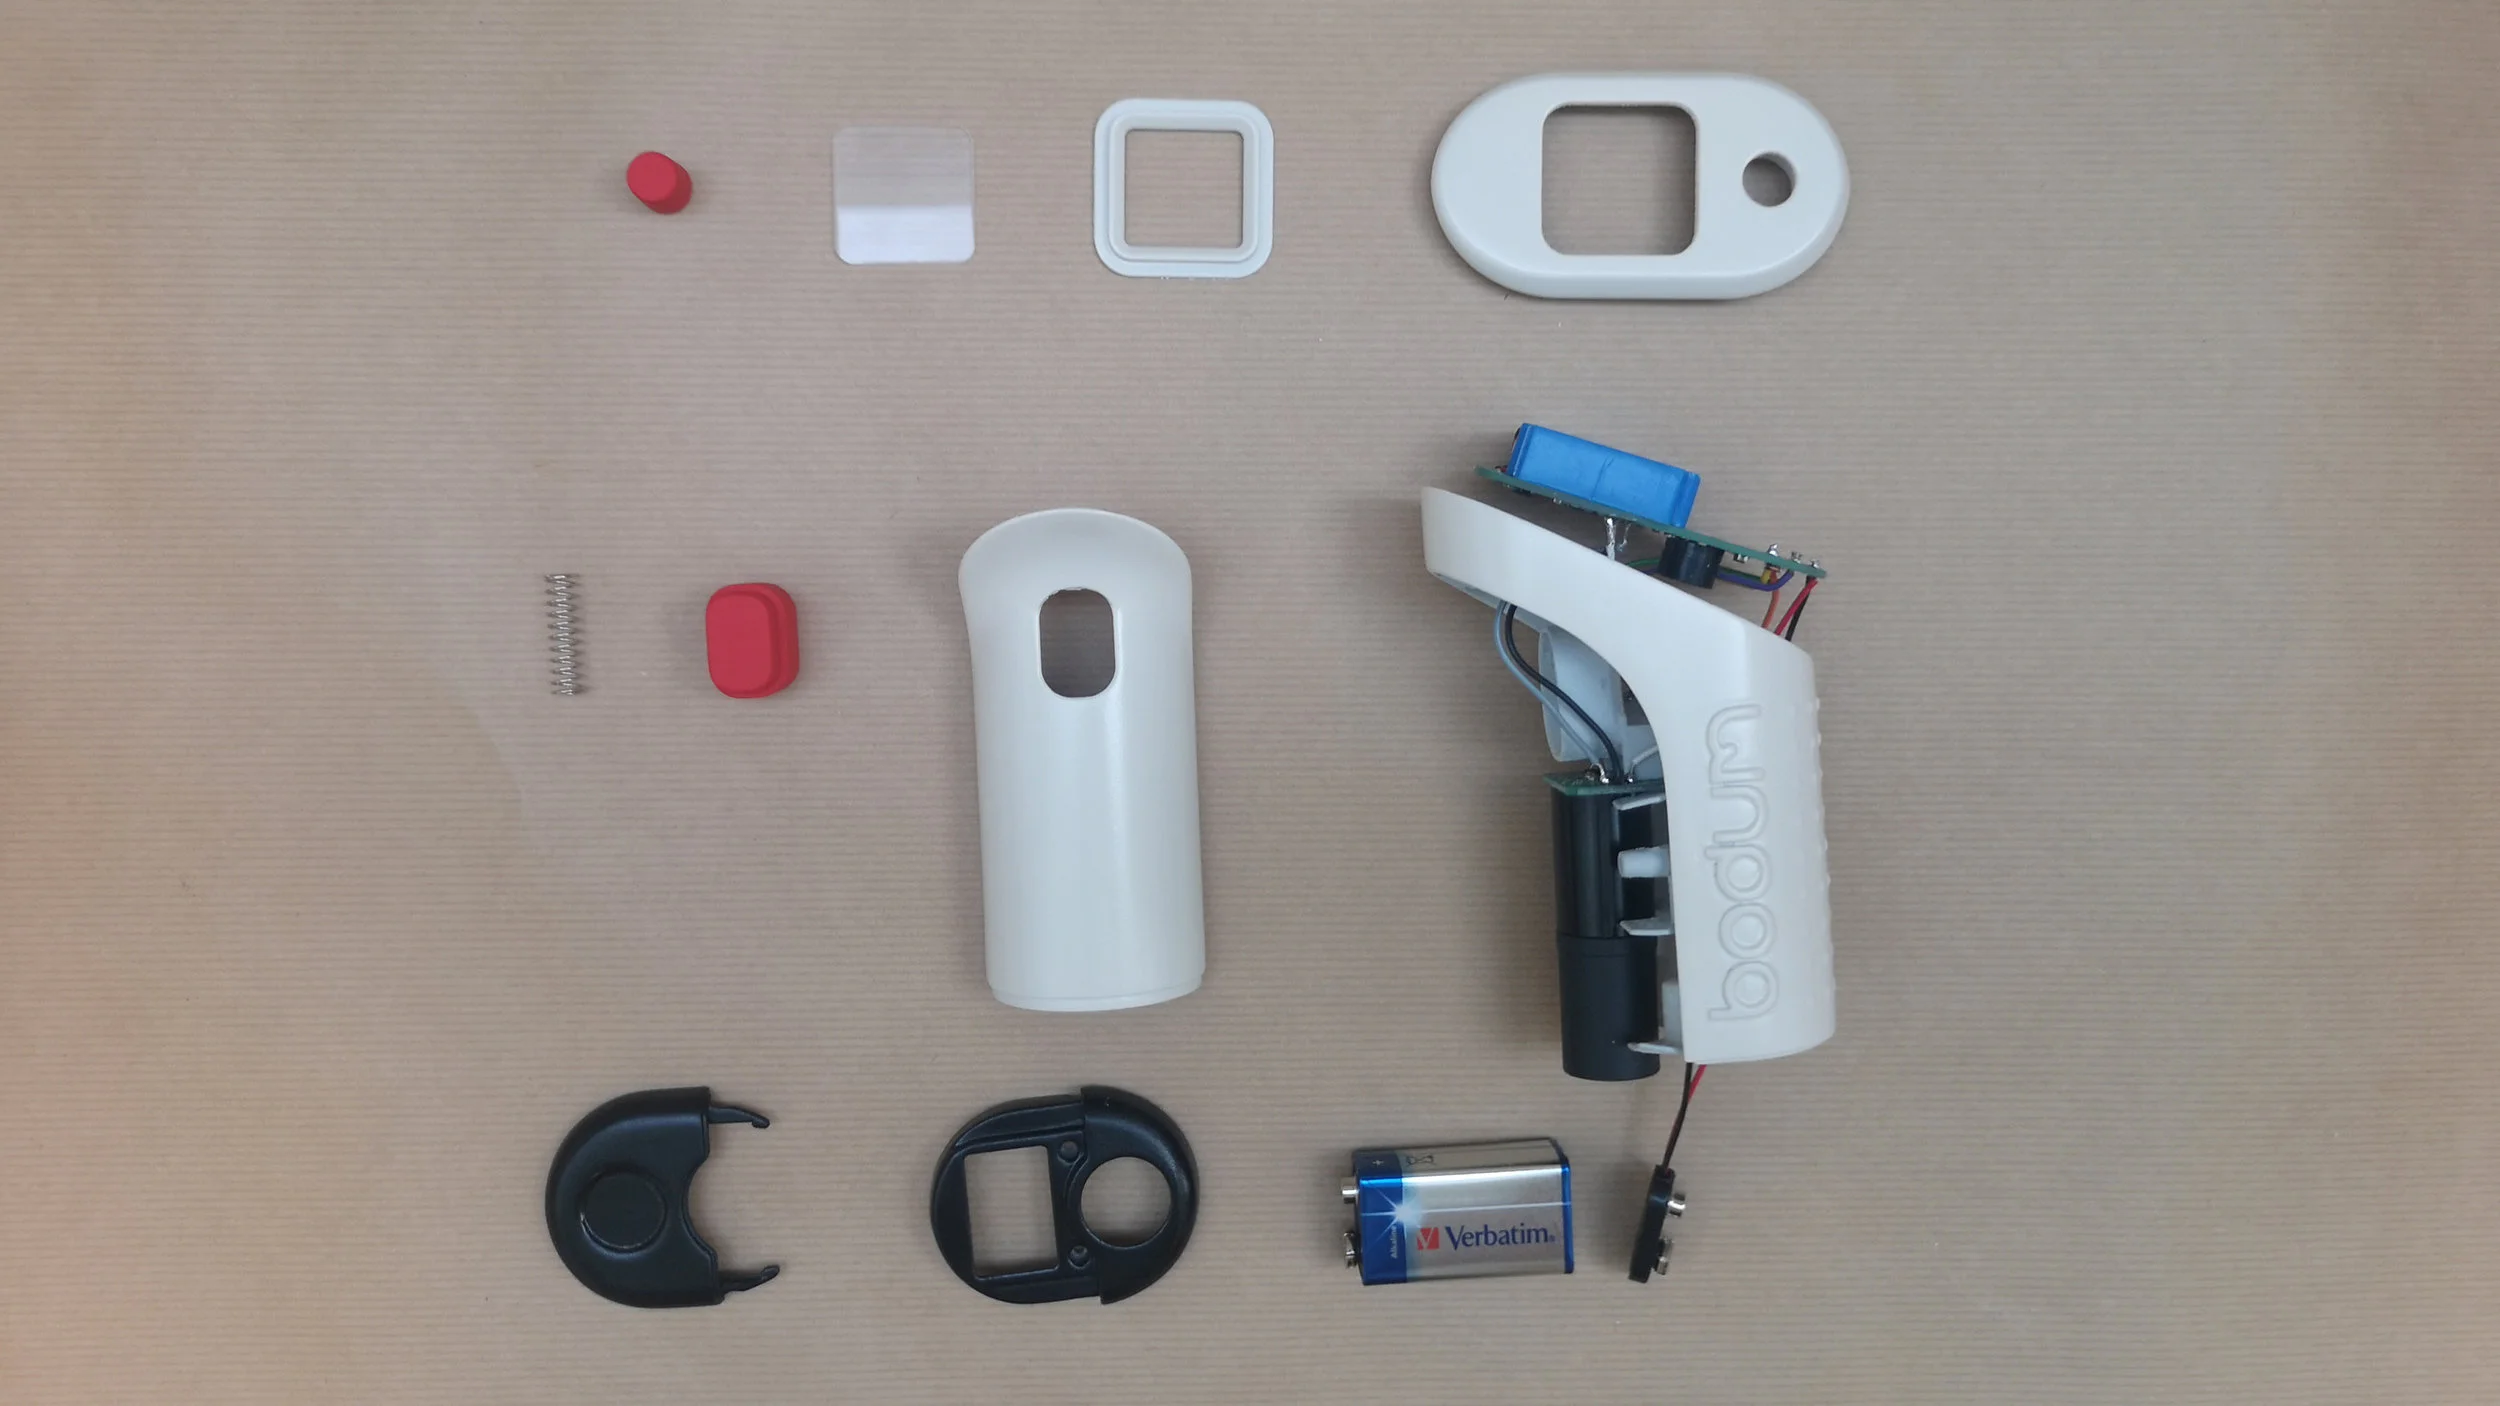
Using the electronic components from an existing IR-thermometer
Design freeze in 20 hours
I wanted to design my thermometer for kitchen use and the brand Bodum, I created a brandboard for their design language to use as inspiration. I decided to rearrange the inner components to move away from the original pistol grip into a self-standing object instead. I used 2d sketching, 3d foam models and photoshop during the design phase, which was limited to 20 hours.


Building of the working prototype
During the project the production methods of the design had to be though-through and considered while I was building the CAD model. All the parts where then 3D-printed before I inserted the electronic components and finally painted and assembled the parts together into a fully working prototype.

CAD (Solid Works)

Soldering the electronic parts

3D - printing

Sanding

3D printed parts

Painting
Design and features
My aim with the re-design of the original thermometer was to turn a technical product into a blend-in kitchen tool with the Bodum design language. With the rearrangement of the inner components I could make the thermometer into a simple self-standing object. I challenged myself to make the size as small as possible, but still an ergonomic grip during use. Split-lines, features and buttons was reduced to the minimum amount for approaching an overall minimalistic design.


Components and production methods
In the CAD model, all the parts where built as they would have been produced by injection molding, including release angels, steering pins, screws and snap-hooks. My biggest challenge was to fit all the inner components in the back-shell and keep that shell as one part, to reduce the amount of split-lines. I managed that by adding another mold-direction instead for that part.


